
I’m going to explain how to bring action into SAP Mobile Cards. By making your cards actionable you bring even more value to these, wallet style, micro apps.
To get started, it’s important to explain there are two types of actions you can perform. Both action types are performed by clicking the Action Menu in the bottom left hand corner of the mobile card.
However, the location to define actions within the SAP Mobile Cards administration is different based on the action type you use. Below, I’ll explain the two types of actions and where/how you create them.
First type – Perform an action on a field within the card so that it interacts with the phone’s capabilities. Some examples of these action types:
- Call the phone number within the card
- Send an SMS to the phone number within the card
- Open that location address within the Maps application
- Launch, with context, another mobile app on the device (i’ll give an example later)
- Share that particular card with another user and more…

The Action menu icon is located in the bottom left hand corner. Screenshot below of some examples of actions a user can perform.
To add these types of actions, open the Card you’d like to work on in the SAP Mobile Cards administration page. Click the Editor section of the HTML page definition of the card. Actions are added by adding the following html classes:
- For Email action – class=”c2g_email” {{*yourMappedEmailField}}
- For Addresses action – class=”c2g_address” {{Street}} {{City}} {{Post Code}} {{Country}}
- For phone & SMS action – class=”c2g_phoneNumber” {{Phone}}
- For URL or Open Mobile App – class=”c2g_website” {{URL or mobile app reference here}}
- For setting a reminder on a card – class=”c2g_timestamp”
Example on how to set a Mobile Cards reminder:
or
***Make sure that the timestamp is valid Javascript Date (see this for all valid formats) or timestamp since 1970 in milliseconds.
The HTML code below shares how the action classes are used for the Becker Berlin customer SAP Mobile Card above.

NEXT – and this is a very cool feature!
The second type of action allows a user to interact with an SAP Mobile Card in a workflow type scenario with the back-end system. Actions for Approve and Reject are great examples. We have sample cards that can do approve/reject for the SAP Unified Inbox / SAP My Inbox and Hybris C4C and a sales manager “Opportunity – discount approval” card.
The above card screenshot shows a workflow approval for a purchase requisition coming from the SAP Unified Inbox (on premise or cloud).

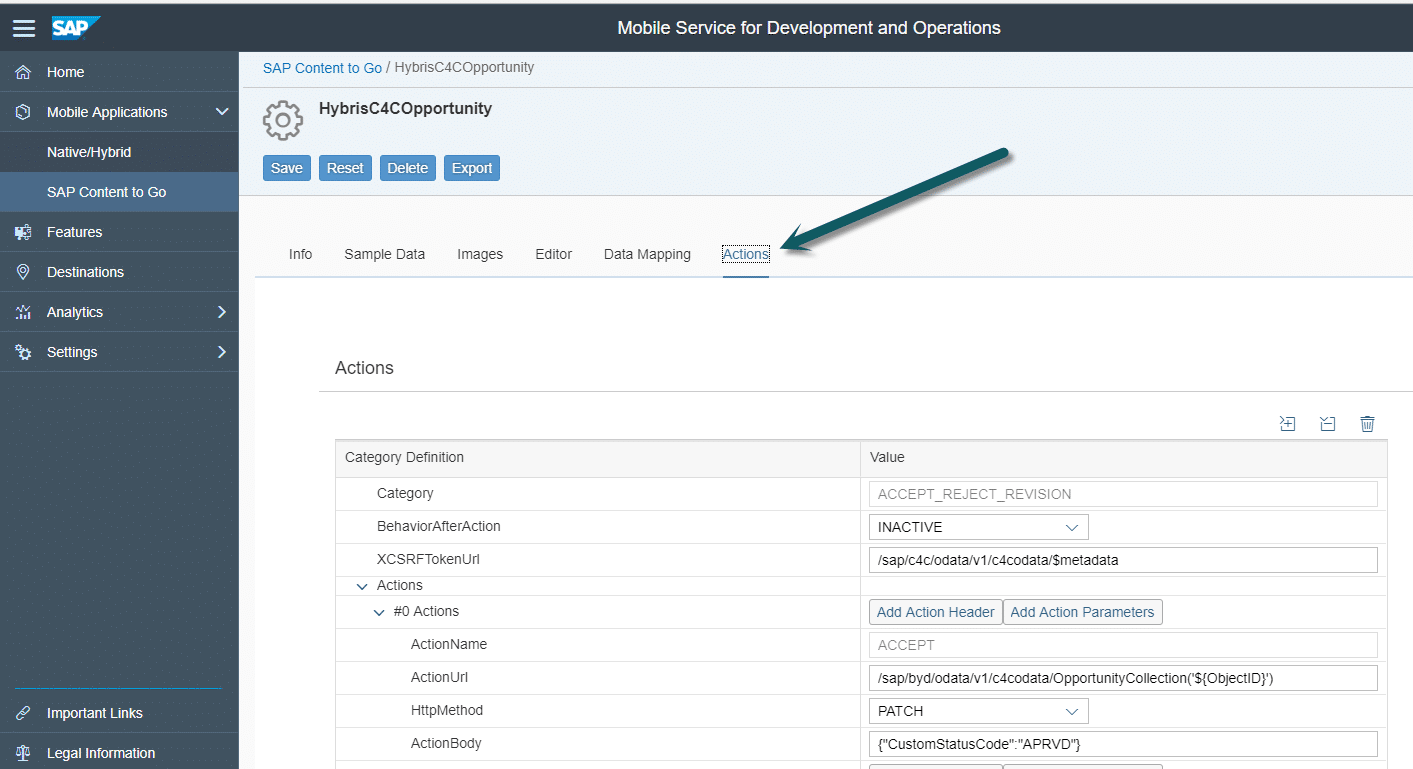
The card displayed above shows a couple of actions. It is a card that connects to Hybris’s Cloud for Customer. It’s an Opportunity Card for a sales manager, whom can approve/reject the discount level AND launch the SAP C4C iPhone mobile app with context to this exact opportunity so a manager can see even more detail.
To add these types of actions, open the Card you’d like to work on in the Content To Go administration page, click the Actions section.
To learn all you need to know about the various action types and how to configure them, check out this 20 minute interactive tutorial:
That’s actions for cards in a nutshell. Look forward to hearing about the use cases our customers come up with.
New NetWeaver Information at SAP.com
Very Helpfull