
related page 1
related page 2
related page 3
NOTE: Before beginning, the XLSX Workbench functionality must be available in the your system.
Suppose we need to generate Excel-file in the background mode.
For ease of example, lets create form, that contains only the classical phrase “Hello world !” nested in the rectangte area. The resultant Excel-file we will send via SAP-mail (in this case – to themselves).
1 PREPARE A PRINTING PROGRAM.
As you can see, most of the code takes the mailing (does not apply to the form creation) :
REPORT z_hello_world .
* declare and fill context
DATA gs_context TYPE lvc_s_tabl .
DATA gv_document_rawdata TYPE mime_data .
gs_context-value = ‘Hello world!’ .
* call the form
CALL FUNCTION ‘ZXLWB_CALLFORM’
EXPORTING
iv_formname = ‘HELLO_WORLD’
iv_context_ref = gs_context
iv_viewer_suppress = ‘X’
IMPORTING
ev_document_rawdata = gv_document_rawdata
EXCEPTIONS
OTHERS = 2 .
IF sy-subrc NE 0 .
MESSAGE ID sy-msgid TYPE sy-msgty NUMBER sy-msgno
WITH sy-msgv1 sy-msgv2 sy-msgv3 sy-msgv4 .
ENDIF .
* mailing
PERFORM send_mail USING gv_document_rawdata .
*&———————————————————————*
*& Form send_mail
*&———————————————————————*
FORM send_mail USING pv_document_rawdata TYPE mime_data .
DATA:
lv_attachment_size TYPE sood-objlen ,
lv_subject TYPE so_obj_des ,
lv_document_size TYPE i ,
lt_document_table TYPE solix_tab .
DATA:
lr_send_request TYPE REF TO cl_bcs ,
lr_mail_message TYPE REF TO cl_document_bcs ,
lr_recipient TYPE REF TO if_recipient_bcs ,
lr_error TYPE REF TO i_oi_error ,
ls_retcode TYPE soi_ret_string ,
lv_attachment_type TYPE soodk-objtp VALUE ‘XLS’ .
CALL FUNCTION ‘SCMS_XSTRING_TO_BINARY’
EXPORTING
buffer = pv_document_rawdata
IMPORTING
output_length = lv_document_size
TABLES
binary_tab = lt_document_table.
lr_send_request = cl_bcs=>create_persistent( ) .
lv_subject = ‘test mail’ .
lr_mail_message = cl_document_bcs=>create_document(
i_type = ‘RAW’
i_subject = lv_subject ) .
lv_attachment_size = lv_document_size .
TRY .
lr_mail_message->add_attachment(
i_attachment_type = lv_attachment_type
i_attachment_subject = space
i_attachment_size = lv_attachment_size
i_att_content_hex = lt_document_table ) .
CATCH cx_document_bcs .
ENDTRY .
lr_send_request->set_document( lr_mail_message ) .
lr_recipient = cl_sapuser_bcs=>create( sy-uname ).
lr_send_request->set_send_immediately( abap_on ) .
lr_send_request->add_recipient(
i_recipient = lr_recipient
i_express = abap_on ) .
lr_send_request->send( i_with_error_screen = abap_on ) .
COMMIT WORK .
ENDFORM . “send_mail
2 PREPARE A FORM.
2.1 Launch XLSX Workbench, and in the popup window specify a form name HELLO_WORLD , and then press the button «Process»:

Empty form will be displayed:

2.2 Push button![]() to save the form.
to save the form.
2.3 Assign context LVC_S_TABL to the form:

Herewith, you will be prompted to create a form’s structure automatically (based on context):

Let’s press the button:  .
.
As result, «Pattern» ( ) and «Value» (
 ) will be added under the «Sheet» in the form structure tree :

Added components will already have a binding with context. For this components, only template binding is required.
We’ll do it later, but first we perform markup of template.
2.4 Make markup in the Excel template:
2.5 Template binding:
- Pose cursor on the
![]() node in the form’s structure tree;
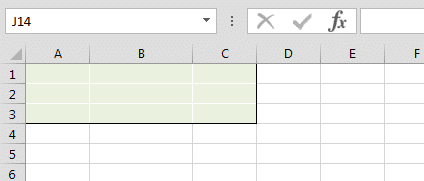
node in the form’s structure tree; - Select a cell range [A1 : C3] in the Excel-template;
- Press a button
![]() located in the item «Area in the template» of the Properties tab:
located in the item «Area in the template» of the Properties tab:
 located in the item «Area in the template» of the Properties tab:
- Pose cursor on the
![]() node in the form’s structure tree;
node in the form’s structure tree; - Select a cell range [B2] in the Excel-template;
- Press a button
![]() located in the item «Area in the template» of the Properties tab:
located in the item «Area in the template» of the Properties tab:
Scheme of bindings:

2.6 Activate form by pressing button![]() .
.
3 EXECUTION.
Launch SE38 and run your report Z_HELLO_WORLD in background mode :


New NetWeaver Information at SAP.com
Very Helpfull