Introduction: This document details out the standard SAP Archival process and also the possible customizations which we can implement while archiving.Data Archiving is the process where in, huge volume of data is deleted from the system which has not been used for a long time. SAP recommends this process of data archiving to clean up the SAP standard tables, to improve the system performance and usability which yield to shorter response time.
Transaction’s Used in Data Archival :
The standard transaction’s used to archive the business objects are SARA, SARJ.
Data Archival Process Flow:
SAP Archival process mainly involves the below steps:
- Preprocessing Operation: This is an optional step , which makes the date/flag value set for the data which needs to be archived, but doesn’t delete the data . This is not found in all archiving objects.
- Write Operation : It is a mandatory step which mainly writes the archival file in the logical file path before deletion occurs, based on the criteria chosen.
- Delete Operation: It is a mandatory step which deletes the archival file which has been written out in the above step.
- Read Operation: It reads the archived data from the storage area after the deletion.
SAP Standard Archiving Objects:
SAP provides many archiving objects , few of the most commonly used are listed below.
| Archiving Object | Description |
| CHANGEDOCU | Change Documents |
| CRM_OPPT | CRM Opportunity |
| CRM_MKTSET | Segmentation Model |
| CRM_MKTTG | Target Groups |
| CRM_LEAD | Lead CRM |
| BC_SBAL | Archiving Object for Application Log |
| CA_BUPA | Archiving Business Partners |
| CRM_ACT_ON | CRM Activity |
This document explains in detail about the various configurations and possible customizations considering the Activity Archiving object – CRM_ACT_ON.
The first section of this document briefs on the various configurations which must be maintained before the archival happens. And the later section details out on the various operations performed during the archival process.
Configuration Steps in Archiving the Object:
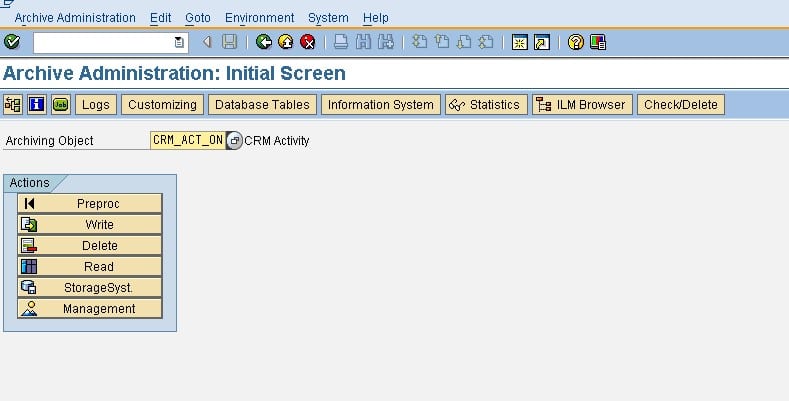
Step1: Goto SARA Transaction and identify the Archiving Business Object for Activity Transaction – CRM_ACT_ON.

Step2: We find many tabs in this transaction. We shall discuss below the most important tabs.
Step3: Customizing: Click on the tab – Customizing. You get many options when you choose the customizing settings.


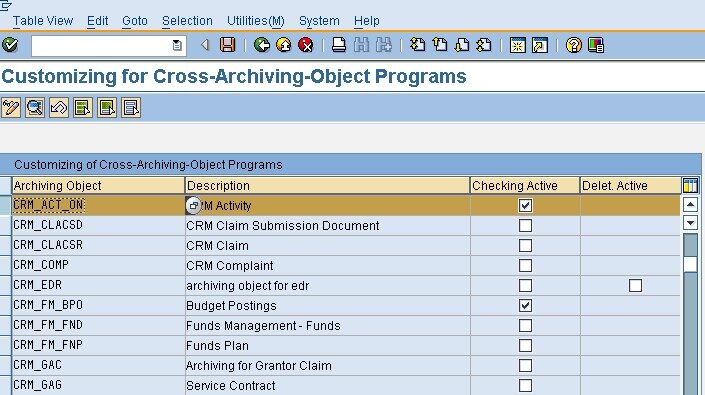
Step4: Click the Technical Settings under the Cross- Archiving Object Customizing. You can change these as per the business requirements or retain the same.


Step5: Check and Delete will show for which archiving objects pre-check is active.
Step6: Under the Archiving Object Specific Customizing settings, we get the below screens.
Step7: Under Technical Settings, we mainly need to maintain the logical file name and the file size.
- Maximum size in DB represents the file size. If this size exceeds , it generates another file.
- The radio button under Delete Jobs-> Start Automatically will trigger the Delete Job soon after the Write Job.

Step8: Under Check and Delete we find the below screen.


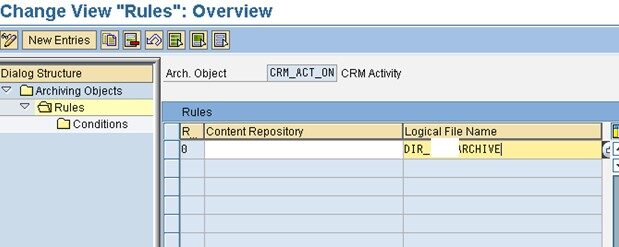
Step9: Under Archive Routing we link the archiving object with the logical file name.


Step10: Click on rules and maintain the logical file name.
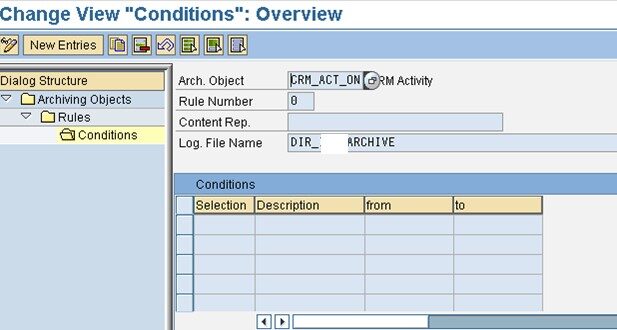
Step 11: Under conditions we can maintain the Selection Criteria which appears in the report program if needed or can be maintained as blank.
Step 12: Click on Basis Customizing, this navigates to FILE transaction. In the FILE transaction we maintain a Logical file name and maintain the same under the Archive Routing. The logical file name indicates where the archival file needs to be placed.


Step13: Choose the Logical file path and click on the Assignment of physical path to logical path to maintain the actual storage location of the Archived files in the system.

Step 14: Click on the Logical File Name Definition, to maintain the file name in which the archived files would be generated.


Step15: By default standard SAP provides the below naming convention for the files.
PARAM_1: This is a two-character application abbreviation for the classification of the archive files in the system. The value of the definition is determined from the relevant archiving object at runtime.
PARAM_2: Single-character alphanumerical code (0-9, A-Z). If, when creating a new archive file, an existing file with an identical physical name would result in a conflict, the ADK increases this value by 1. This value must, therefore, always be a part of the physical name.
PARAM_3: This parameter is filled at runtime with the name of the archiving object. In archive management, this enables you to check the file contents or to store the archive files by archiving objects.
Step16: Next Tab –Database Tables: Click on Database Tables to check all the impacted tables for the given Archiving Object. It lists down all the standard tables from which data gets deleted on archiving the chosen business object.

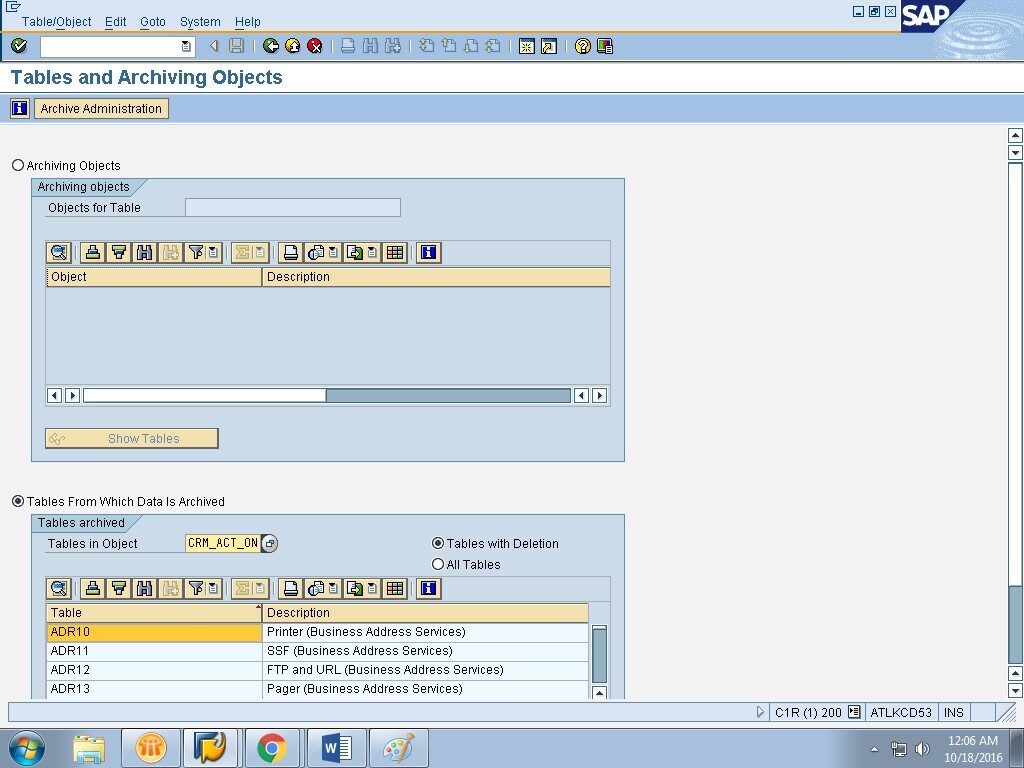
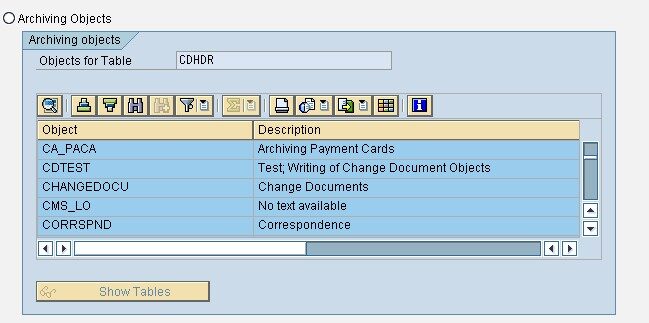
Step17: If we choose a particular table and click on Show Objects , at the top, its displays all the Business Objects where the chosen table data, gets deleted when we archive any of those objects.

Step18: Next tab – Information Systems: Click on Information systems to activate the Archiving object. This is a mandatory steps before we execute the Write/Delete jobs, as activating the infostructure related to the archiving object will generate a custom Z table to store the archived data of that particular business object.

Step19: Click on Customizing.

Step20: Select the Archived Infostructure of the archived object and click on activate , this generates a custom Z table and a Z report .This Z table will hold the data once it is archived, And the Z report gets called when we try to read the archived data.

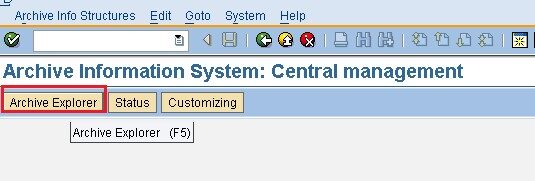
Step21: Click on Archive Explorer , to evaluate the Archive Infostructure.

Step22: SAP by standard provides a set of fields in each infostructure , all the fields on left side are considered while generating the table and they appear as table fields and hold the archived data .We can choose all the required fields as per our business need from the existing list before activating the infostructure. Once the infostructure is activated we cannot change the Z table.
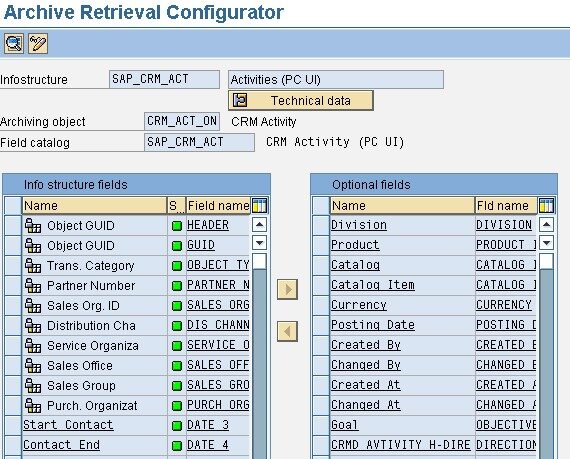
Step23: On click of Technical data, we can see the generated Z table and the generated report program.

Step24: The generated Z table may be have a different name in different servers. That depends upon the sequence of the archiving objects in each system.

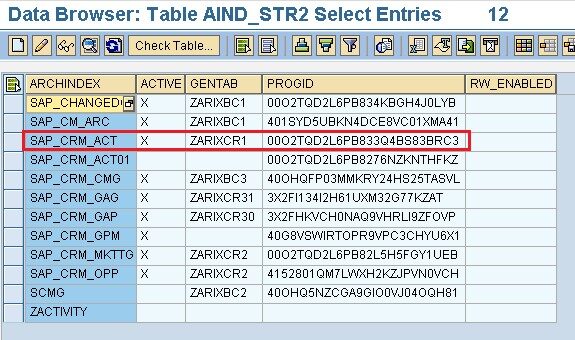
Step25 : The generated Z table and report program is maintained in the standard table AIND_STR2.
Step26: In transaction SE38 , the generated report is available with suffix GP .

Step27: In standard table – RSSGTPDIR, this program is maintained.

Step28: This standard report gets called in Standard Archive Search on Activities in Web UI. In case we need to enhance the search then we can prepare a Z report and replace the standard report with the Z one.


Step29: In Web UI, we can search on archived activities from the Archive search button as shown below.

Step30: Logs- Logs/Jobs are buttons which displays the list of jobs which have run and its statuses.

Operations involved in the Archiving process:
Step1: Preprocessing : It is the first step in archiving process , this is an optional step and may not be available in all archiving objects. This sets the archiving date/flag set but doesn’t delete the data.

Step2: When you click on the Preprocessing , we get a screen to choose the variant , start date and spool parameters. Variant identifies the set of activities that needs to be deleted based on our business need.

Step3: Enter a variant name and click on Maintain.

Step4: At the backend, it will be a selection screen of the report program , which selects the data to be archived.
There are two radio button here one for Test mode and another for Production mode. Only on production mode the data gets deleted.

Step5: Sometimes based on our business need, we may need to have few more selection criteria , in that case we can replace the standard backend report program with a Z one.

Step6: To assign the Z report in place of the standard report, we need to go to the standard transaction AOBJ and choose the archived object-CRM_ACT_ON and replace the standard reports with the Z one. This holds good for the remaining operations – Write/Delete as well.
In table ARCH_OBJ we can find the changes done in the above transaction. In this process ,as a single step we can replace check/write/delete program.

Step7: Also in the preprocessing step, the standard validations/ selections happen in a standard function module, which is maintained in table – SWOTLV . These FM’s get selected at runtime, though a Z report program has been prepared. Choose the OBJTYPE as ‘BUS200110’ for Activities and under VERB- DARGEPRESELET replace standard FM with the Z one.

Step8: After the variant is maintained , maintain the Start date, which decides when the job must run.

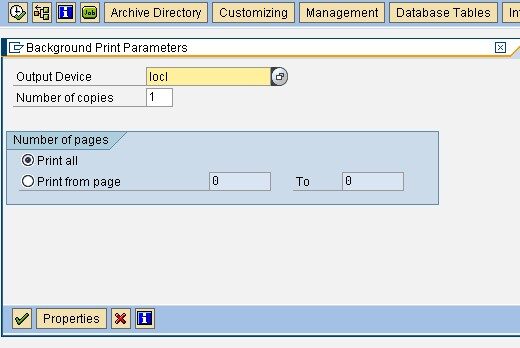
Step9: Select the Spool parameters and click on excute.This schedules a background job for preprocessing steps.
Step10: In Job Overview, we can see the various jobs that are run with the status and spool details. From the Job name we can identify the operation occurred.
WRI- Write Operation
DEL- Delete Operation
Step11: Write : Similarly for Write operation maintain the screen variant/start date /spool parameters and execute the job.Write program is the most important program because it decides which activities must get archived and places the archived files in the logical path maintained in archive routing.
Write program can have a different selection criteria all together, we can do the same by replacing standard report with Z one.
Test Mode : Will display the data which will be written to the archived file.
Production Mode : Writes the file to be archived in the file path.

Step12: If production mode is chosen, then always maintain the below details in the log.

Step13: Deletion: In the deletion operation we have the Archive Selection instead of the variant and the same start/spool parameters.

Step14: On click of Archive Selection we get the list of Archived files which are ready for deletion. We can choose multiple files for deletion. Once the delete job is executed the data gets deleted from the standard SAP tables.

Step15 : Read: The read operation as well executes the read program to read the archived data.


New NetWeaver Information at SAP.com
Very Helpfull