
Earlier we used to design th UI screens using SAP UI5 for which we need to install another softwares like Eclipse,WEB IDE, etc where we design the screen using them and every later for every changes we need to submit to SAP server everytime which was very time consuming process.With the evolution of Neptune which is an add-on to SAP where we can build the screen and access the data in SAP GUI itself which makes the development much more easier.
Requirement:
A Neptune application to display general customer details in list page based on customer number and country & navigate to detail page on clicking on a table row in list page and display customer master details based on customer number.
Step 1: Go to SE93, provide the Neptune t.code /Neptune/Designer and click on execute.
Step 2: Provide application name and click on create.
Step 3: In settings, provide the description & application class and in library tab select the radio button SAPUI5 & check sap.m library checkbox.
Step 4: In theme tab, select Bluecrystal.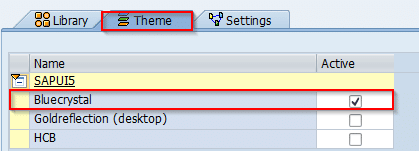
Step 5: In order to download app into your Neptune system, go to SE93. Give transaction code as /NEPTUNE/APPSTORE and click on execute.
Now search for app, select sap.m.App, click on Import. Then code snippet app will be added to your Neptune library.
Step 6: In order to use code snippet app, go to designer tab. In objects panel, right click on HTML5 Document. Select code snippets -> Neptune -> Code Snippet – App.
Step 7: Now go to class builder by clicking on class builder button.
Step 8: In the interfaces tab, provide the interface as follows.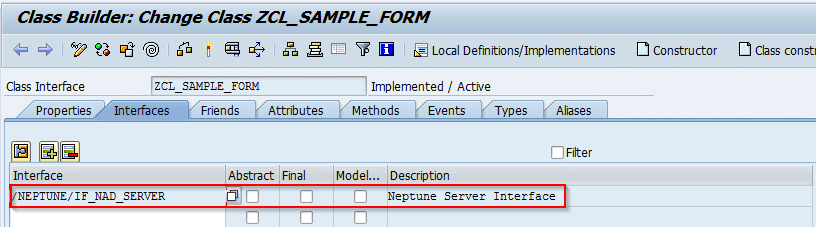
Now go to Methods tab and click on Handle OnAjax method.
Step 9: Write the code as follows.
METHOD /neptune/if_nad_server~handle_on_ajax.
CASE ajax_id.
WHEN ‘GET_CUST_DETAILS’.
get_kna1_details( ajax_value ).
WHEN ‘GET_CUST_MASTER’.
get_knb1_details( AJAX_VALUE ).
WHEN ‘GET_POPUP’.
get_popover( ).
ENDCASE.
ENDMETHOD.
Step 10: Now declare the methods in methods tab.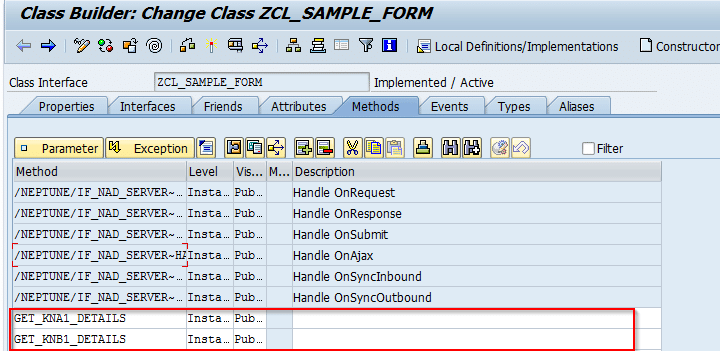
Now click on GET_KNA1_DETAILS method to implement it.Write the code as follows.
METHOD get_kna1_details.
** Data Declaration
DATA : l_no TYPE kunnr, “Customer number
l_country TYPE land1_gp. “Country
SPLIT I_data AT ‘:’ INTO l_no l_country. “Splitting the input
** Adding leading zeroes to material number
CALL FUNCTION ‘CONVERSION_EXIT_ALPHA_INPUT’
EXPORTING
input = l_no
IMPORTING
output = l_no.
** fetching data based on input
SELECT kunnr
land1
name1
ort01 INTO TABLE i_kna1 FROM kna1 WHERE kunnr = l_no AND land1 = l_country.
EndMethod.
Now click on GET_KNB1_DETAILS method to implement it.Write the code as follows.
Method GET_KNB1_DETAILS.
** fetching data from knb1
SELECT KUNNR
BUKRS
ERDAT
ERNAM FROM KNB1 INTO TABLE I_KNB1 WHERE KUNNR = VALUE.
Endmethod.
Save, check and activate the class.
Step 11: OShell->oApp-> oPageSelection->headerSelection-> Middle->txtTitleSelection. Go to Attributes panel, provide text in the properties as Customer Details which will be our main page heading.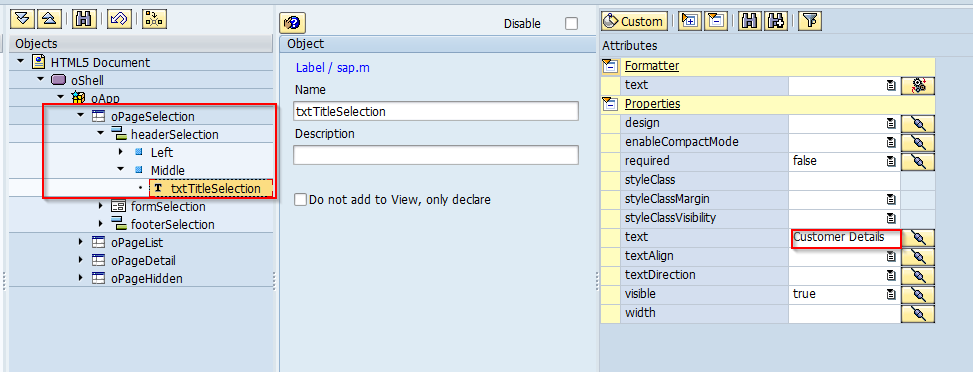
Step 12: Now in form selection provide work area w_kna1 in Model Source and provide it’s corresponding Ajax ID.
Now click on Additional model send / receive button, in order to enable receiving and sending data from the current form selection.
Step 13: Now go to formSelectionTitle1 and check disable check box.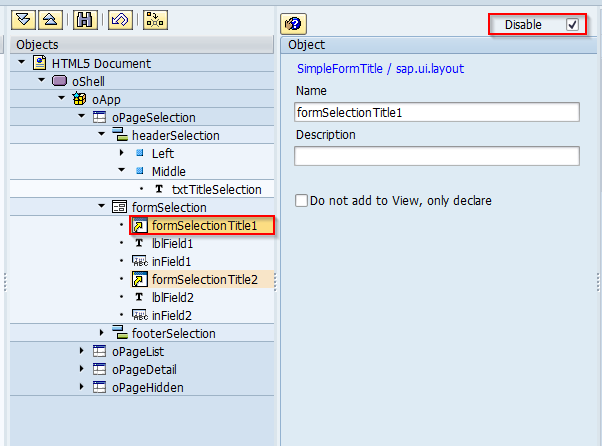
Do the same for formSelectionTitle2.
Step 14: Now go to click on lblField1 button to get selection text as Customer number, provide text in the properties of attribute panel.
Do the same for lblField2.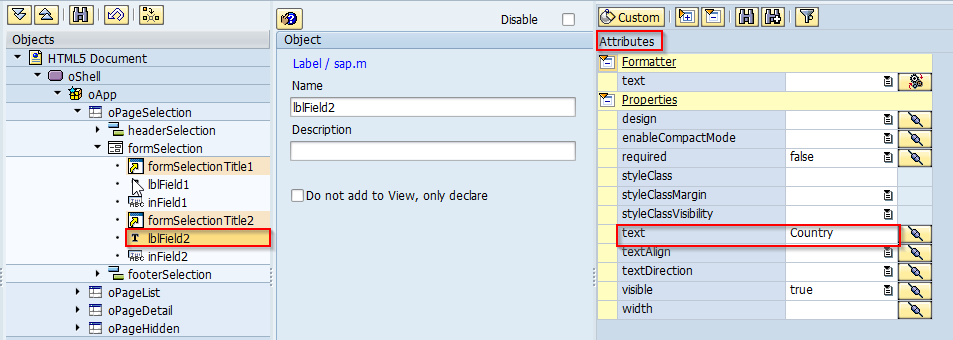
Step 15: Now click on inField1 button, in order to bind customer number to the field. Assign kunnr to the value in the Attributes panel.
Do the same for inField2, to bind country name.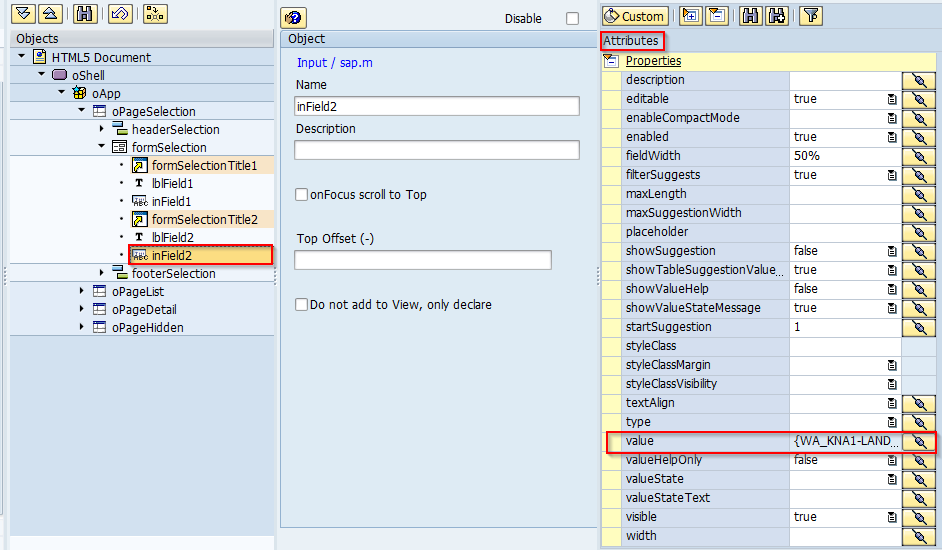
Step 16: Now Go to footerSelection-> Right -> butSelectionSearch. Now in Attributes panel click on button right to the press event.
Write the following JavaScript code.//getting input values
Var no = sap.ui.getCore().getElementById(“inField1”).getValue();
Var country = sap.ui.getCore().getElementById(“i inField2”).getValue();
//navigating to list page
oApp.to(oPageList);
getOnlineformSelection( no + ‘:’ + country );
Step 17: Now go to oPageList -> click on Table button. Provide Model Source & Ajax ID on object panel and header text as Customer Details in Attributes panel.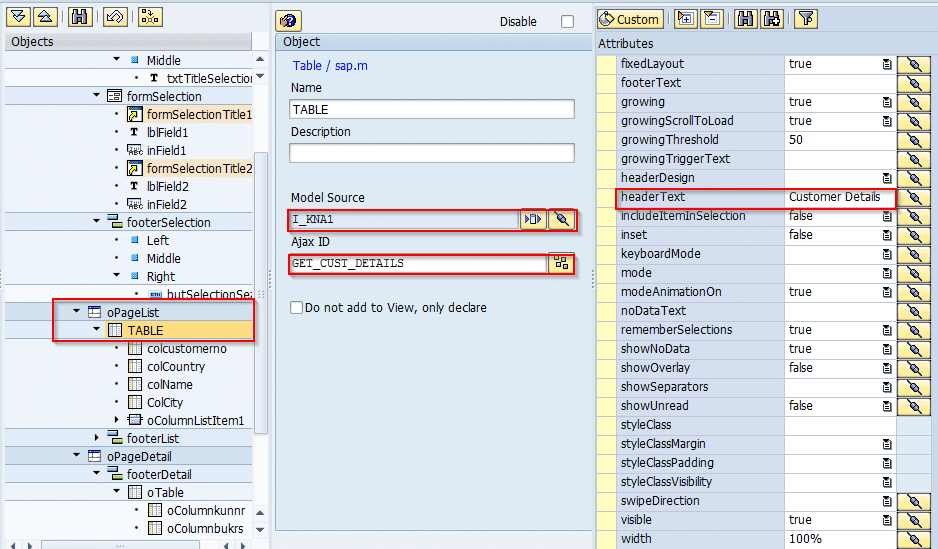
Now click on Additional model send / receive button, in order to enable recieving and sending data from the current form selection.
Step 18: Now click on colcustomerno column button and provide text as “customer no” in Attributes panel.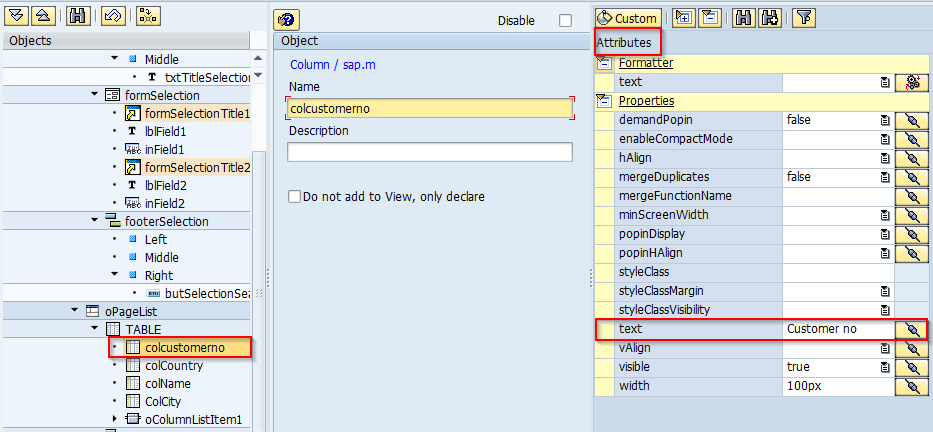
do the same for country, name and city.
Step 19: Now go to column list item -> click on txtkunnr text button and assign the kunnr in the table to text property in the attribute panel to bind kunnr to table column.
Do the same for country, name and city.
Step 20: Go to oPageList -> Table -> click on oColumnListItem1. Now provide type as navigation and click on press event button.
Write the following code in press event.
//Getting selected row
var context = oEvent.oSource.getBindingContext( );
//Getting Single Field
var value = context.getProperty( “KUNNR” );
console.log( value );
//Getting Entire Model
var data = context.getObject( );
console.log( data );
getOnlineoTable( value );
oApp.to( oPageDetail );
Step 21: Now click on oPageDetail button, provide title as Customer master Details in attribute panel.
Step 22: Click on oTable button, provide model source & ajax id.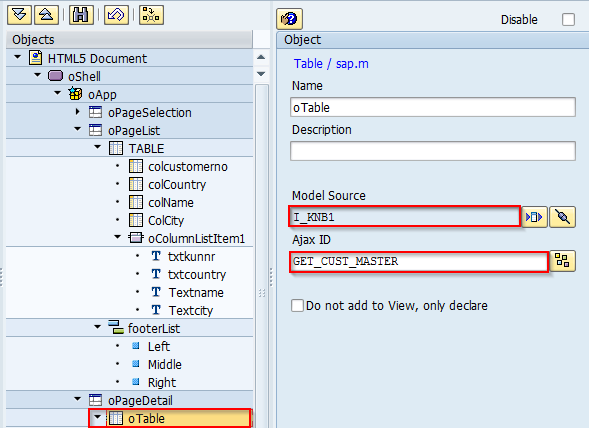
Click on Additional model send / receive button.
Step 23: As we are only displaying customer master details in oTable, there is no need of checking any other check box as receive for oTable is selected by default. Step 24: In order to add column heading as Customer no. Go to oPageDetail -> oTable -> click on oColumnkunnr. Provide text in attributes panel.
Do the same for company code, created on and created by.
Step 25: In order to bind a field to a column in the table. Go to oPageDetail -> oTable -> oColumnListItem -> click on oTextkunnr. Assign I_KNB1-KUNNR to text in properties of Attributes panel.
Do the same for BUKRS, ERDAT and ERNAM.
Step 26: Save and activate. Click on Run in Browser.
Step 27: Provide input as follows and click on search.
Step 28 : The output of the first table is as follows.
Now click on the selected row, based on customer number it will fetch the data from KNB1 table and will display in details page.
Step 29: The final output is as follows.
New NetWeaver Information at SAP.com
Very Helpfull