
Foreword
Push Notification Management: If you ask any Fiori developer what mobile device features are missing from the web, push notifications are always high on the list. Web push notifications allow users to opt-in to timely updates, resulting in better engagement with timely new updates.
Our intention of writing this article is to make you understand (theoretically) and implement (coding) push notifications in your SAP UI5 apps. Therefore, our target audiences include Solution Architects and Application Developers who are familiar with SAP UI5.
To better understand the working of web push, it is recommended to get familiar with the web technologies behind it, but explaining these web technologies is beyond the scope of this article. Hence, we have provided hyperlinks to external resources for your reference and future readings.
Let’s get started!
Web Push is an optional feature that gives web applications ability to receive messages pushed to them from a server, whether or not the web app is in the foreground, or even currently loaded on a web browser. This lets developers deliver asynchronous notifications and updates to users who opt in, resulting in better engagement with timely new updates.
Technically, the Web Push API, a W3C standard, provides the ability to deliver real time events (including data) from application servers (app servers) to their client-side counterparts (web browser), without any interaction from the user.
How does it work?
Web apps can install a Service Worker, a background web page with a limited set of functionality that can subscribe to the push service. The application server can then send a push message through Web Push service to your browser, which can process that message and display a notification on your screen.

Understanding Notification Workflow
The following are the three agents involved in a push notification,
Web App
The user facing part of the program that runs on a browser. It interacts with the browser in order to request a Push Subscription, and receive Subscription Updates
SAP NW Gateway (App Server)
The back-end service that generates Subscription Updates for delivery across the Push Server
Web Push Server
The server that is responsible for handling events and delivering them to the correct subscriber. Each browser vendor has their own Push Server to handle subscription management. For instance, Mozilla Firefox uses autopush and Google Chrome uses FCM (formerly called as GCM)

The above diagram illustrates the sequence of the push notification work flow explained here:
| 1 | Subscribe | The Application that subscribes to Push in order to receive updates, or the user who instructs the Application to subscribe to Push, e.g. by clicking a “Subscribe” button. |
| 2 | Endpoint (Subscription Info) | The subscription object contains all the required information needed to send a push messages to that user. An endpoint is a specific URL that can be used to send a Push Message to a specific Subscriber. |
| 3 | Send Endpoint | Once you have a push subscription you’ll want to send it to your back-end server and save it. |
| 4 | Post to Endpoint | Whenever an end user needs to be notified, the unique endpoint URL of that particular user is retrieved and posted to the web push server with payload data. |
| 5 | Push Message | A message sent from the Application Server to the Application, via a Push Server. This message can contain a data payload. |
It’s time to get your hands dirty
What you’ll need
- Google Chrome 52 or above / Mozilla Firefox 44.0 or above
- A text editor (Eclipse, SAP Web IDE etc.,)
- Basic knowledge of HTML, CSS, JavaScript, SAP UI5 and Chrome DevTools
- Download the source code of this demo
For this demo I’m using SAP Web IDE trial edition, where I’ve created a SAP UI5 application. The source code of the application can be downloaded from the above link. When you run the application, you should see a page that looks like this:

Register a Service Worker
In your app directory, notice that you have a file named sw.js, which will be your service worker. We will look into the functional part of this service worker in the later section.
Our first step is to register our service worker. By registering the service worker we are telling the browser where our service worker file is located in the app directory. The file is a JavaScript file, and browser will give it access to the service worker API.

This code checks if the current browser actually supports service worker and push messaging. If it supports, then it registers our sw.js file and the service worker registration object is stored in swRegistration.
While browser support is growing quickly for both service worker and push messaging, it’s always advisable to check whether the current browser actually supports these features.
Get Application Server Keys
To work with this demo, you need to generate some application server keys. You can create a public and private set of application server keys by visiting https://web-push-codelab.appspot.com or if you are familiar with Node JS, you can use the web-push command line to generate keys by doing the following:
$ npm install -g web-push $ web-push generate-vapid-keys Please note, you only need to create these keys once for your application, just make sure you keep the private key private.
Here I’m using keys generated through https://web-push-codelab.appspot.com

Copy your public key into controller/App.controller.js replacing the appServerPublicKey property.

Initialize State
Initially, the notification button is disabled and can’t be clicked. It is a good practice to disable the button by default and enable it once you know the browser supports service worker and push.
Now let’s look into the two functions in controller/App.controller.js, one called initialiseUI, which is to check whether the user is currently subscribed, and updatePushBtn is called upon to enable the button and change text based on whether the user is subscribed or not.

In this code, initialiseUI method uses the swRegistration from the previous step and calls getSubscription method on its pushManager. The getSubscription method returns a promise that resolves with the current subscription (if there is one), otherwise it will return null. By this we can check whether the user is already subscribed or not. Then by calling updatePushBtn method we can enable the button and enable it with some helpful text.

In this code the function simply changes the text depending on the whether the user is subscribed or not and then enables the button.
The last thing is to call initialiseUI when our service worker is registered.

Subscribe a User
To enable user to subscribe, let’s attach a listener to our button in the initialiseUI method.

When the user clicks the push button, we first disable the button just to make sure the user can’t click it a second time while we’re subscribing to push as it can take some time to receive response from the push server.
As you can see, in the attached listener function we have two new methods namely subscribeUser and unsubscribeUser. First let’s focus on subscribeUser, which is called when we know that the user isn’t currently subscribed.

Let’s step through the above code and see how it is subscribing the user for push messaging.
First we take the application server’s public key, which is base 64 URL safe encoded, and convert it to a UInt8Array as this is the expected input of the subscribe call. This conversion is taken care by the urlB64ToUint8Array method, which is shown below.

After converting the value, we call the subscribe method on our service worker’s PushManager. In the subscribe method, we pass in an options object, which contains our application server’s public key and value userVisibleOnly: true.
Before we proceed further, let’s understand the visible only option and application server keys.
User Visible Only Options (User Privacy)
Since push is an experimental technology, there still exists uncertainty among browser vendors about whether developers should be able to send a push message and not show a notification, referred to as silent push, due to the user not knowing that something had happened in the background.
There were concerns like a developer could track a user’s location on regular basis without the user knowing.
To avoid this and to give specification authors (W3C) time to consider how best to support this feature, the userVisibleOnly option was added and passing in a value of true is an agreement with the browser that the web app will show a notification every time a push is received.
As of now, for Chrome browser, you must pass in a value of true. If you don’t include the userVisibleOnly key or pass in false you’ll get an error like “Chrome currently only supports the Push API for subscriptions that will result in user-visible messages”
In Firefox userVisibleOnly is optional or doesn’t require.
Application Server Keys
We just mentioned about “application server keys” in the previous section. Application sever keys are used by a push service to identify the application subscribing a user and ensure that the same application is sending notification messages to that user.
Application server keys are a public and private key pair that is unique to your application. The private key should be kept as secret to your application and the public key can be shared freely.
The applicationServerKey option passed into the subscribe method call is the application’s public key. The browser passes this onto a push service when subscribing the user, meaning the push service can tie your application’s public key to the user’s PushSubscription.
The below diagram illustrate these steps:
- The web app loaded in a browser, calls subscribe method, passing in the application server public key.
- The browser then makes a network request to a push service which will generate a unique endpoint, and associate this endpoint with the applications public key and return the endpoint to the browser.
- The browser will add this endpoint to the PushSubscription, which is returned via the subscribe method promise.

When we later want to send a push message, we’ll need to create an Authorization header which will contain information signed with the application server’s private key. When the push service receives a request to send a push message, it can validate this signed Authorization header by looking up the public key linked to the endpoint receiving the request. If the signature is valid the push service knows that it must have come from the application server with the matching private key. It is basically a security measure that prevents anyone else sending messages to an application’s users. The below diagram illustrates this:

The specification that defines what the application server key should be is the VAPID spec. Whenever you read something referring to “application server keys” or “VAPID keys”, just remember that they are the same thing.
Going back to where we left, calling subscribe method returns a promise which will resolve after the following steps:
- The user has granted permission to display notifications
- The browser has sent a network request to a push service to get the subscription info to generate a push subscription
On successful execution of the above steps, the subscribe promise will resolve with a PushSubscription. If the user denies permission or if there is any service problem subscribing the user, the promise will reject with an error.
Either we get the subscription and treat the user as subscribed or catch an error; we call updatePushBtn method to ensure the button is re-enabled and has the appropriate text.
The updateSubscriptionOnServer is a method where in a real application we would send our subscription information to a backend server and store. But for this demo we are going to print the subscription in our UI which we will need later on.
When try clicking the button in the web app you should see permission prompt like this:

If you grant the permission you should see the button’s text will change to “Disable Notification” and you’ll be able to view the subscription as JSON in the UI as below:

The subscription object contains all the required information needed to send a push messages to that user. Closely watching the subscription, you’ll see the following:

The endpoint is the push services URL. To trigger a push message, make a POST request to this URL.
The keys object contains the values used to encrypt message data sent with a push message (reference).
Handle Permission Denied
Now let’s see how to handle a situation where the user blocks the permission request. This needs some unique consideration because if the user blocks the permission, our web app will not be able to re-show the permission prompt and will not be able to subscribe the user, so we need to at least disable the push button so the user knows it can’t be used.
The obvious place for us to handle this scenario is in the updatePushBtn function. All we need to do is check the Notification.permission value.

We know that if the permission is denied, then the user can’t be subscribed and there is nothing more can be done, so disabling the button is a best approach.
Since we’ve already granted permission for our web app from the previous step we need to click in the start of the URL bar and change the notifications permission to Use global default (Ask).

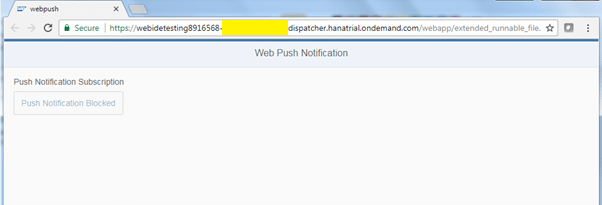
After you’ve changed this setting, you will be forced to reload. After refresh, click the Enable Push Messaging button and this time select Block on the permission dialog. The button is disabled and text will change to “Push Notification Blocked”.
With this change we can now subscribe the user and also take care of the possible permission scenarios.
Handle a Push Event
Before we look into how to send a push message from backend, let’s see what will actually happen when a subscribed user receives a push message.
When a push message is triggered, the browser receives the push message, figures out what service worker the push is for and wakes up that service worker and dispatch a push event. Then the browser listens for this event and shows a notification as a result.
Check the following code in the sw.js file:

Let’s step through this code. We are listening for push events in our service worker by adding an event listener to our service worker.
Unless you’ve played with Web Workers before, self is probably new. self is referencing the service worker itself, so we are adding an event listener to our service worker.
When a push message is received, our event listener will be fired, and we create a notification by calling showNotification on our registration. It expects a title and we can give it an options object. Here we are going to set a body message, icon and a badge in the options.
The last thing to see in our push event is event.waitUntil. This method takes a promise and the browser will keep your service worker alive and running until the promise passed in has resolved.
Now that we’ve stepped through the push event, let’s test out a push event.
With our push event in the service worker we can test what happens when a message is received by triggering a fake push event using DevTools.
After successfully subscribing to notification, go to the Application panel in DevTools and under the Service Workers tab click on the Push link under your service worker.

Once you’ve clicked it you should see a notification like this:

User clicking on the notification can be handled by listening to notificationclick events in your service worker.

When the user clicks on the notification, the notificationclick event listener will be called. In this demo, we open a new window loading the URL “https://www.sap.com/”
We are calling event.waitUntil again to ensure the browser doesn’t terminate our service worker before our new window has been displayed.
Sending push messages
We’ve seen that our web app is capable of showing a notification using DevTools and looked at how to handle notification click. Now let’s see how to send an actual push message.
Normally the process for this would be sending a subscription from a web page to a backend and the backend would then trigger a push message by making an API call to the endpoint in the subscription to the push server.
This is out of scope for this demo, but we can use the companion site, https://web-push-codelab.appspot.com/ to trigger an actual push message. To do so, first copy the subscription information in the text area:

Then paste this into the companion site in the Subscription to Send To text area. Then under Text to Send we can add any string we want to send with the push message and finally click the Send Push Message button.

You should then receive a push message.

This should give you a chance to test out sending and receiving data and manipulate notifications as a result.
The companion app is actually a node server managed by Google, which is using the node web-push library to send messages. Please check out web-push-libs on Github, to see the list of open source libraries that are available to send push messages. As of now, web push library is available for Java, JavaScript, C# etc, and yet to be available for ABAP.
Unsubscribe the user
Finally, let’s see how to allow users to unsubscribe from push. To do this we need to call unsubscribe on a PushSubscription.
Let’s check the unsubscribeUser method we called in the initialiseUI. In this method we’ll get the current subscription and called unsubscribe on it.

In this code, first we get the current subscription by calling getSubscription method. This returns a promise that resolves with a PushSubscription if one exists, otherwise it returns null. If there is a subscription, we call unsubscribe on it, which makes the PushSubscription invalid.
Calling unsubscribe returns a promise as it can take some time to complete, so we return that promise so the next then in the chain waits for unsubscribe to finish. We also add a catch handler in case calling unsubscribe results in an error. After this we can update our UI.
Now you should be able to press the Enable Notification / Disable Notification in your web app and see the user being subscribed and unsubscribed.
Considerations
This is an experimental technology
Because this technology’s specification has not stabilized, check the compatibility table for usage in various browsers. Also note that the syntax and behaviour of an experimental technology is subject to change in future versions of browsers as the specification changes.
Technical Limitations
- Since it is an experimental technology, implementation and behavior of browsers may vary from version to version (especially older versions).
- There are certain limitations in using open web push services provided by browser vendors. These limitations include size of payload, frequency of pushing messages to client etc. And these limitations may vary from time to time for each browser vendor as their policies are continuously evolving.
Choosing the right messaging technology
Bear in mind that Push is not meant to replace richer messaging technologies like Firebase Cloud Messaging (FCM), Apple Push Notification system (APNs), or Microsoft’s Windows Notification System (WNS). Each has their benefits and costs, and it’s up to you as developers or architects to determine which system solves your particular set of problems. Push is simply a low cost, easy means to send data to your application.
Helpful Resources
- Service Worker
- Push API
- Promise
- VAPID
- Browser compatibility table for notification support
- Web push libraries
This is the part of overall fiori enrichment article written by Arun Santhanam. You can click on the below link to know more details about that.
New NetWeaver Information at SAP.com
Very Helpfull