
A SAP UI5 application using Element binding in Web-IDE: Data Binding is used to maintain a data sink between two systems.
We have different data binding techniques when we come to SAP UI5.
The different data binding techniques are:
One-way binding: The data flows from model to the controller.
Two-way binding: In two way binding the data flows from model to controller and vice-versa.
Aggregation binding: In which we create a local JSON file within the model, which is light weight to store data and directly we can access in the application.
Expression binding: In expression binding we can perform certain simple calculations and format the view.
OData binding : To access the data in the real server.
Etc.
Now coming to our application.
Step 1: Go to Web IDE click on file -> New -> Project from template.

Step 2: As we gonna create a SAPUI5 application, select SAPUI5 Application and click on Next.

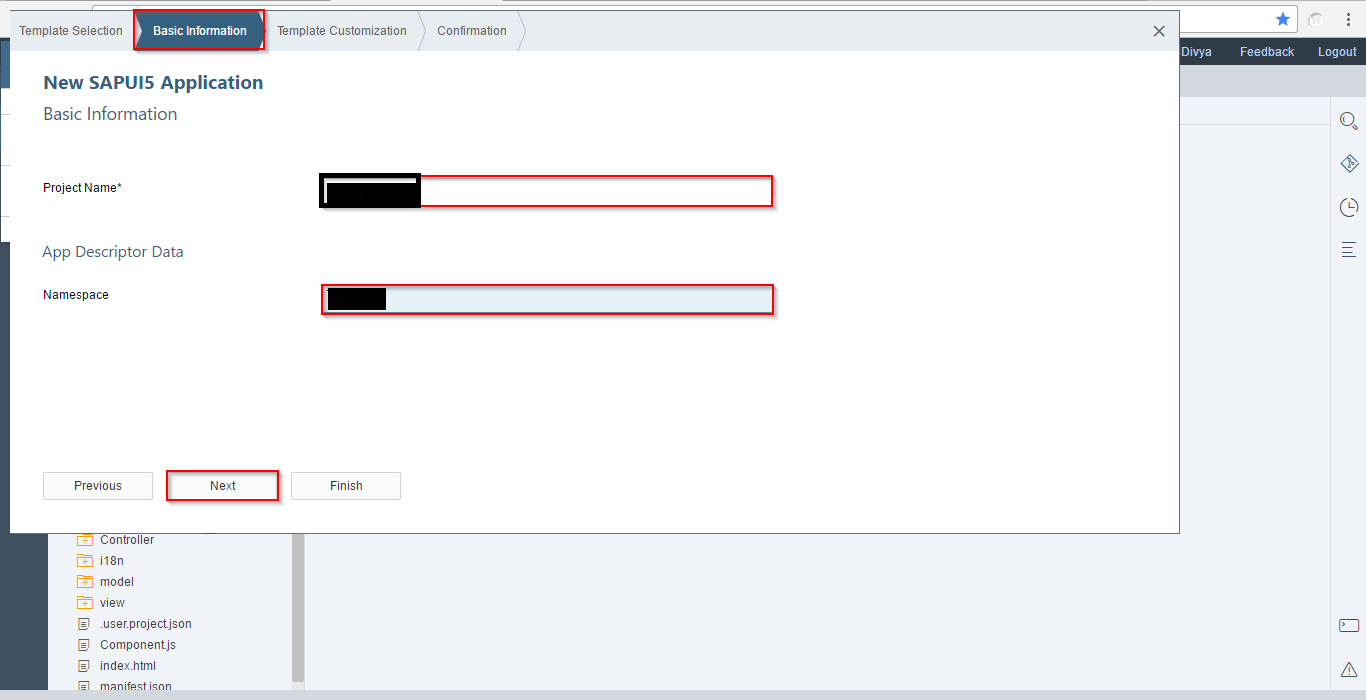
Step 3: Provide project name and descriptor namespace which is our manifest.json file. We create a descriptor to configure our app. Click on Next.
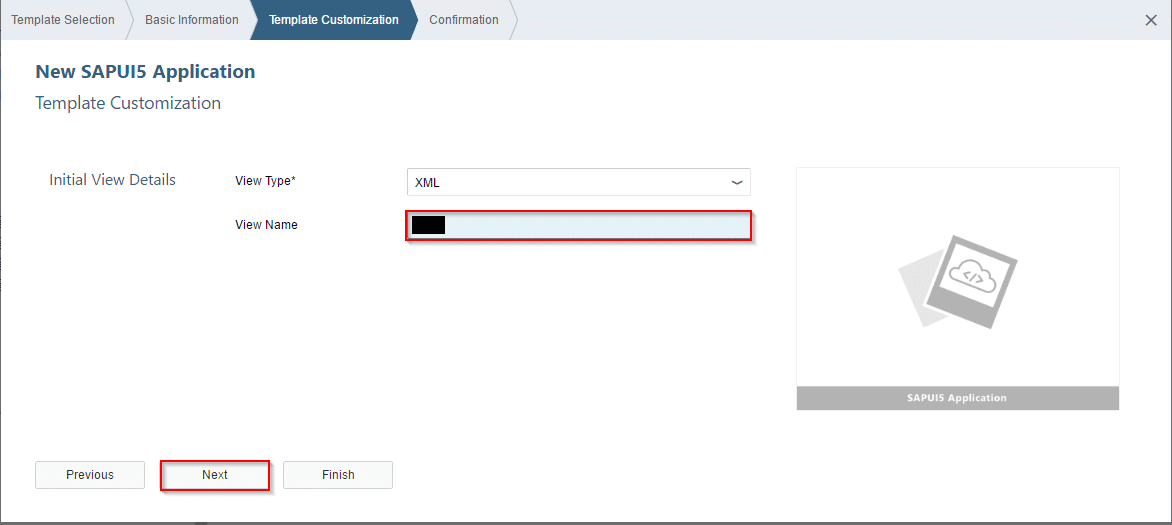
Step 4: Provide the view name and click on Next.
Step 5: click on Finish.

Step 6: Create a JSON file with in main folder and write the code as follows.
{
“Name”: “Divya B”,
“Street”: “Vinayaka Nagar”,
“HouseNumber”: “16”,
“ZIPCode”: “5330003”,
“City”: “Visakhapatnam”,
“Country”: “India”,
“Url”: “www.Yahoo.com”,
“Twitter”: “@div”,
“Tel” : “+91 9898989898”,
“Email” : “[email protected]”
}
Step 7: (opensap/nav/view/App)
Bind the each input field using element binding as below.
/Name}”/>
Step 8: ( opensap/nav/Controller/App ) Write the code as follows in the controller. Here we are trying to access i18n properties.
sap.ui.define( [ "sap/ui/core/mvc/Controller" ], function(Controller) { "use strict"; return Controller.extend("opensap.nav.Controller.App",{ inIt: function() { // read msg from i18n model var oBundle = this.getView().getModel("i18n").getResourceBundle(); }, }); });Step 9: ( opensap/nav/i18n/i18nproperties )
All the descriptions and labels are maintained here.
#
layoutNewButton=New
#
layoutDraftButton=Save Draft
# Layout Content
layoutFormName=Name
layoutFormStreet=Street
layoutFormHouseNumber=Door No.
layoutFormZIPCode=ZIP Code
layoutFormCity=City
layoutFormGender=Gender
layoutPublishButton=Publish
layoutDraftButton=Save Draft
layoutGenderMale=Male
layoutGenderFemale=Female
Step 10: Component.js
In order to configure you application and set the manifest & access our custom styles file, write the code as follows.
sap.ui.define([ "sap/ui/core/UIComponent" ], function (UIComponent) { "use strict"; return UIComponent.extend("opensap.nav.Component", { metadata : { manifest: "json", includes: ["css/style.css"] }, init : function () { // call the init function of the parent UIComponent.prototype.init.apply(this, arguments); } }); });Step 11: Here we add properties of different components we used in the application like i18n.properties, style.css, Address.json etc. in the sap.ui5 part of manifest.json.
"sap.ui5": { "_version": "1.2.0", "rootView": { "viewName": "opensap.nav.view.App", "type": "XML", "id": "app" }, "autoPrefixId": true, "dependencies": { "minUI5Version": "1.34", "libs": { "sap.ui.core": { "minVersion": "1.34.0" }, "sap.m": { "minVersion": "1.34.0" }, "sap.ui.layout": { "minVersion": "1.34.0" } } }, "contentDensities": { "compact": true, "cozy": true }, "models": { "i18n": { "type": "sap.ui.model.resource.ResourceModel", "settings": { "bundleName": "opensap.nav.i18n.i18n" } }, "Address": { "type": "sap.ui.model.json.JSONModel", "uri": "model/Address.json" }, Step 12: The output is as follows.

Further I will explain Aggregation binding by adding some more functionality.
New NetWeaver Information at SAP.com
Very Helpfull