
Introduction
This document will give you in details all the necessary steps (Backend and Frontend) to use easily the file upload feature in your SAP SAPUI5 apps.
ABAP Back End preparation
Use the Data Dictionary tool (SE11) to prepare a new DD structure for the entity type to be created for uploading files
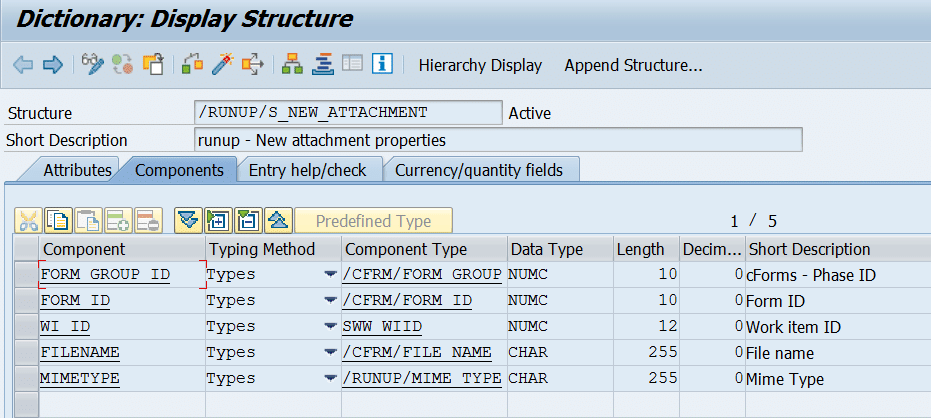
The Goal in the given example is to upload a file for workflow task and the workitem ID is used as one of the keys for the new file
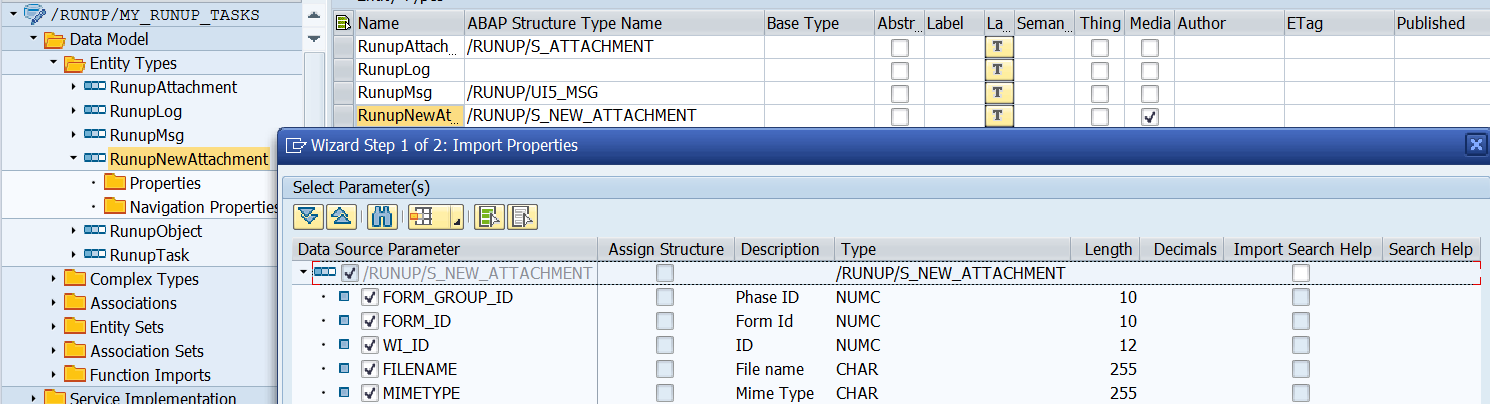
Call the Gateway Services Builder (SEGW)

Create a new entity type that refers the dictionary structure created in step 1 and flag the media checkbox
Import the entity type properties from the dictionary structure if not done during entity type creation

Save and generate
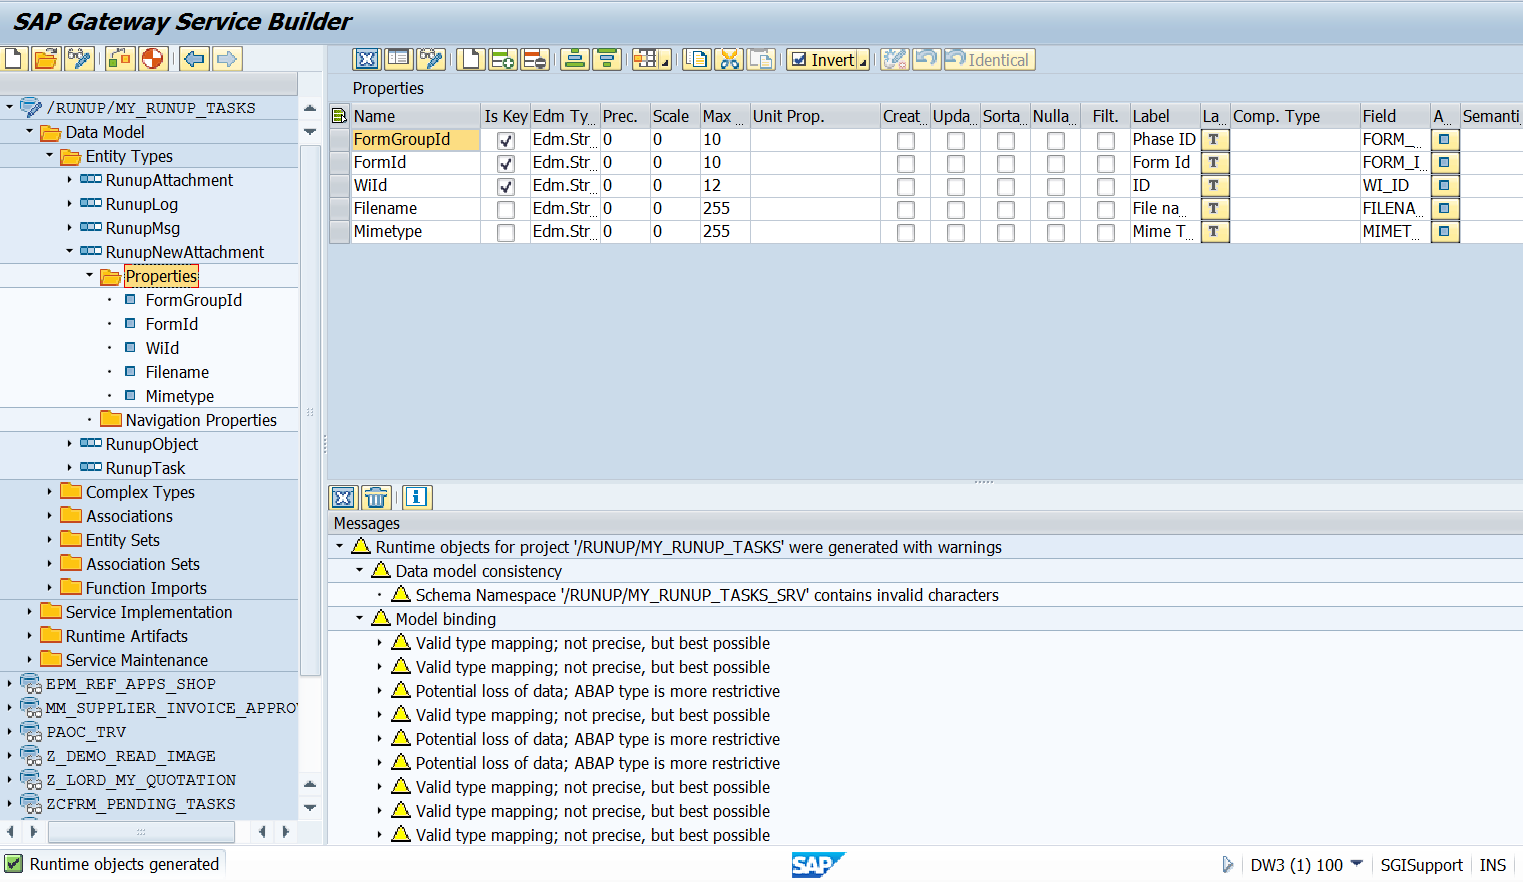
Update the data model definition using the MPC_EXT generated class


Redefine the standard method called DEFINE as below to declare your mime type property as content type for the new entity. In this provided example the property is called “Mimetype”

Frontend preparation
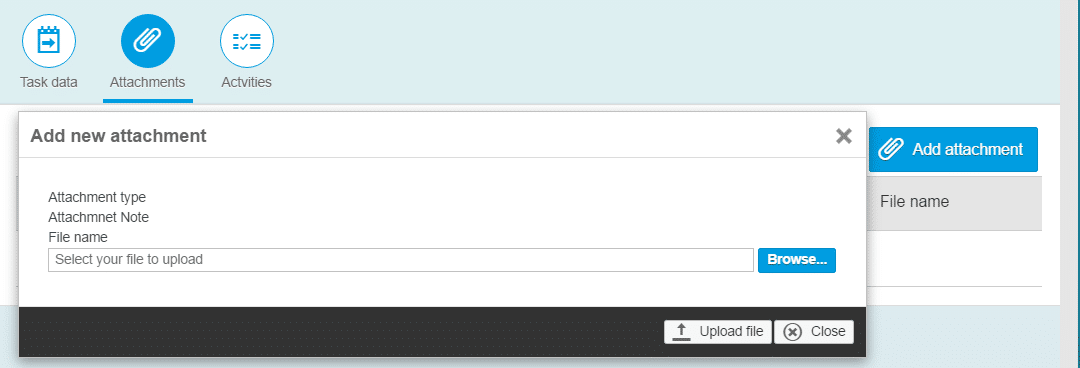
XML fragment for uploading your file
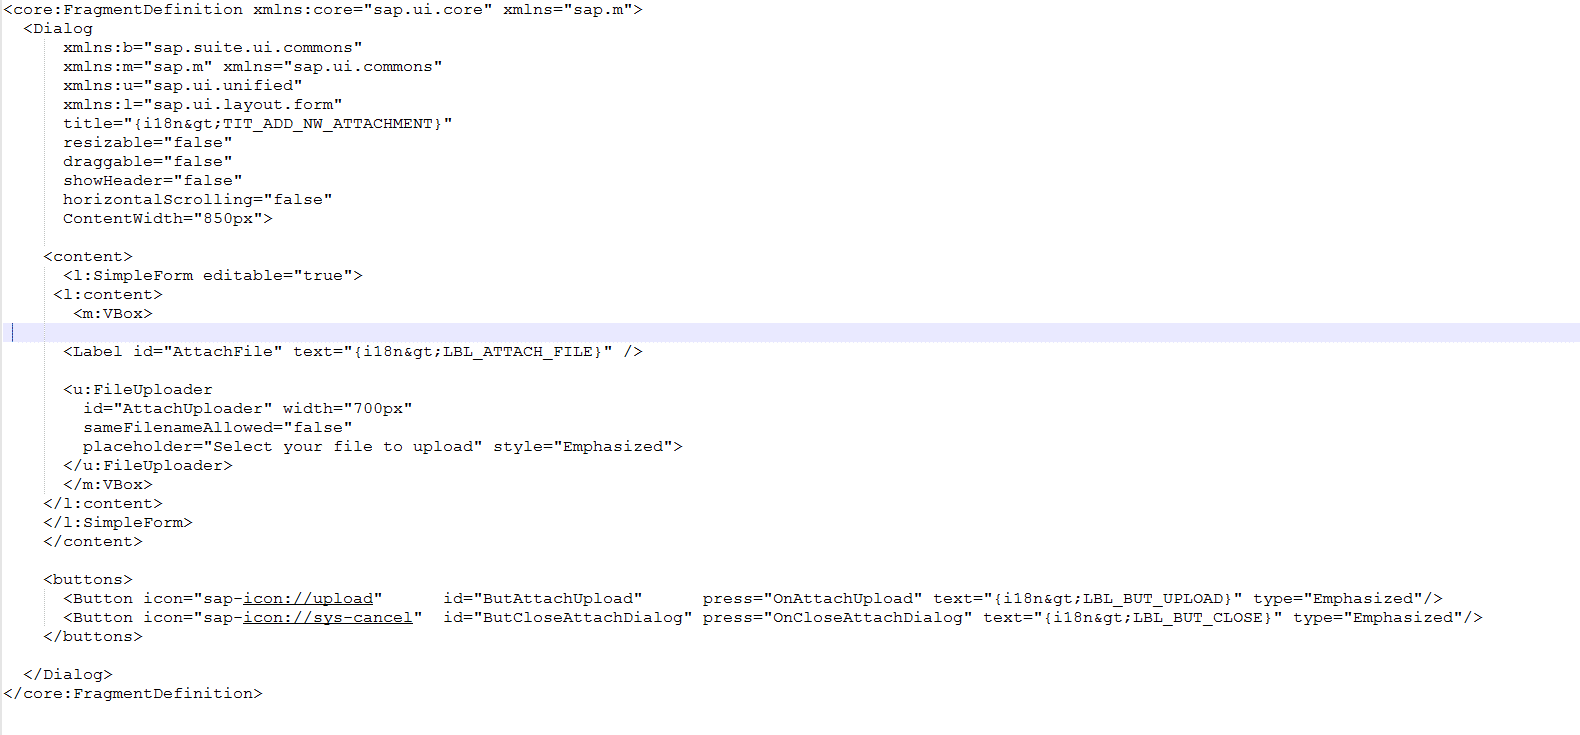
For reuse purposes, you can define a dialog in a XML fragment to be called from the view
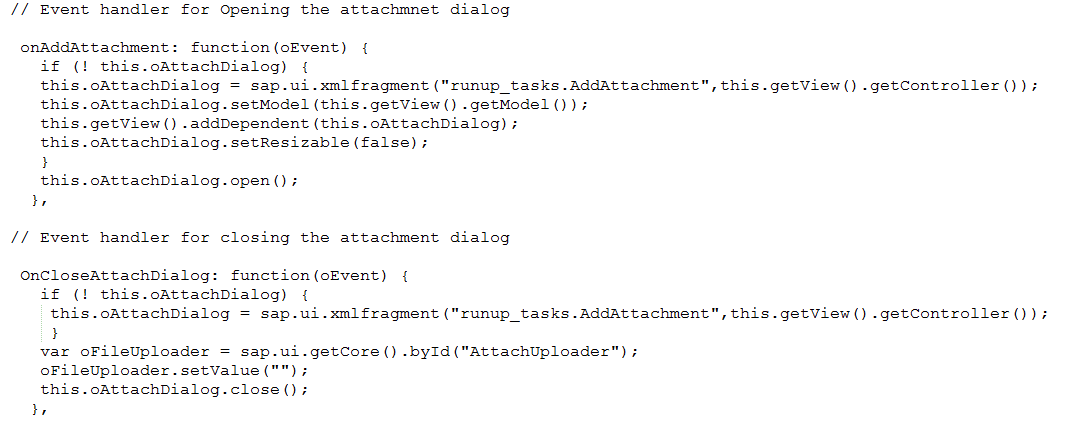
Instantiating the XML fragment in the view (js) and closing the dialog
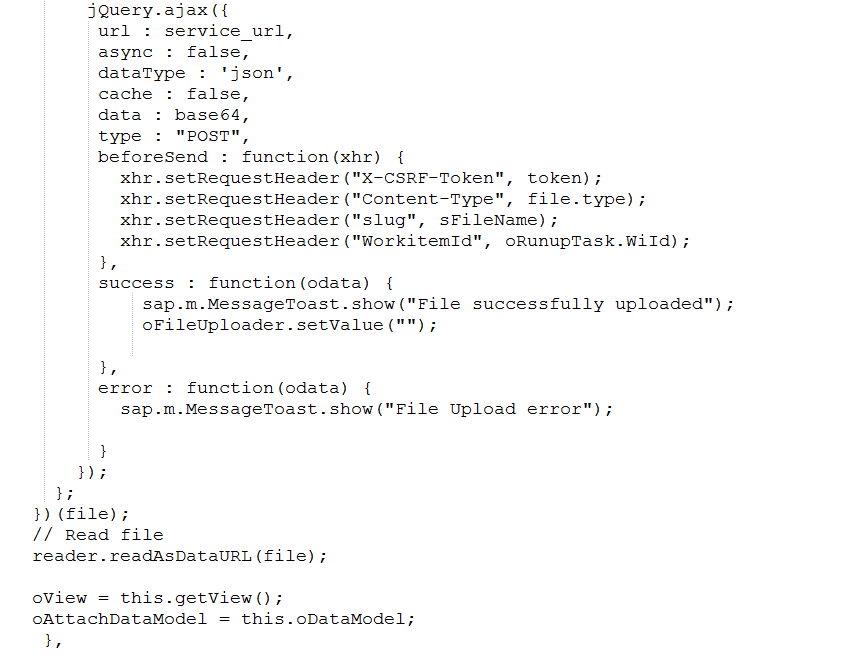
Code to POST the file binary content to back end

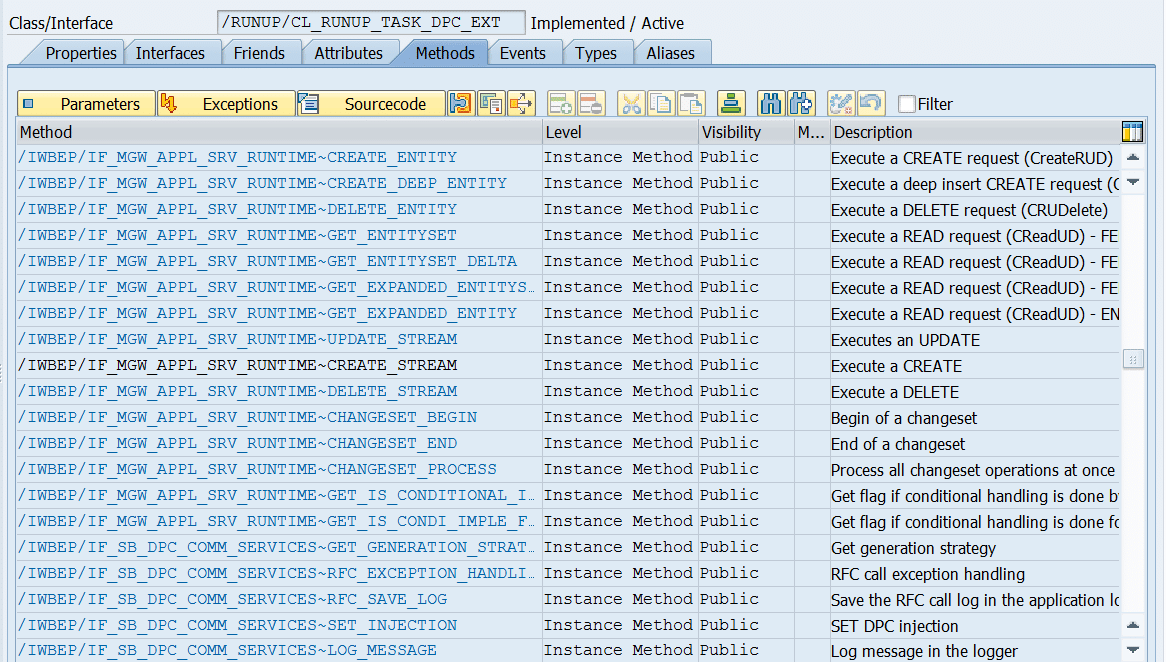
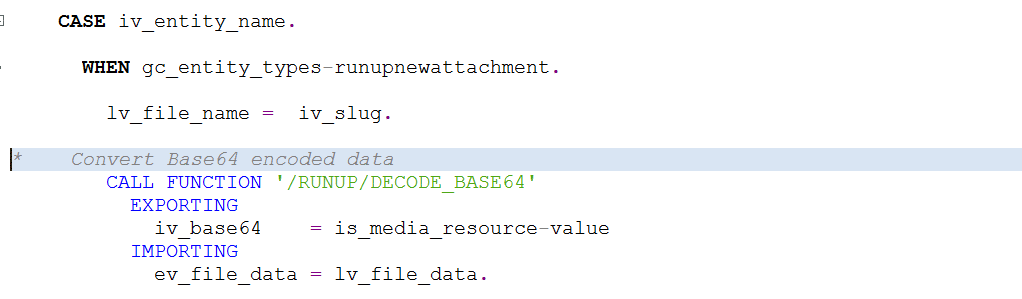
CREATE_STREAM method redefinition
After preparing all the frontend elements, you need to redefine the method CREATE_STREAM Of the generated class DPC_EXT

The above code will allow you to read the parameters sent in the request header (like workitemid in the provided example)
After you can decode the base64 content to a xstring data and handle your content as you wish . In the provided example, I am using a home made function to transform the base64 to a xstring to be stored in SAP DMS later.
New NetWeaver Information at SAP.com
Very Helpfull