
Hi everyone, today I want to share the solution to a small problem that was holding me back for a few hours.
We had to build a configuration for a custom Azure webservice API call.
Nothing special to be honest but the challenge was hidden within the small detail supplied by the Azure Team “you have to set a custom http header”.
Every webservice request had to have the http header attribute “Ocp-Apim-Subscription-Key” with a specific value.
To make things worse, the system in use was a PI 7.1 system with nothing else than the standard SAP adapters supplied.
The synchronous scenario looked like the following:
Sender Application -> SAP PI -> Azure API -> SAP PI -> Sender Application
We tried to make this work with the standard SOAP HTTP adapter and the SOAP HTTP AXIS adapter. But without success.
In the end, we decided to go with the standard HTTP 1.0 Adapter and do the SOAP stuff by hand.
And that’s what I want to present today, because I had some troubles to even get to this point and had to collect some stuff from various sources to make things work. So hopefully someone with the same problem can get a complete solution from this blog post.
Solution:
Use a standard http receiver channel and add all custom http headers in the intended fields and use an operation mapping between sender and receiver where you manually add the soap envelope via xslt mapping for the request and remove the soap envelope manually via xslt mapping for the response.
Set up your XSLT Mappings
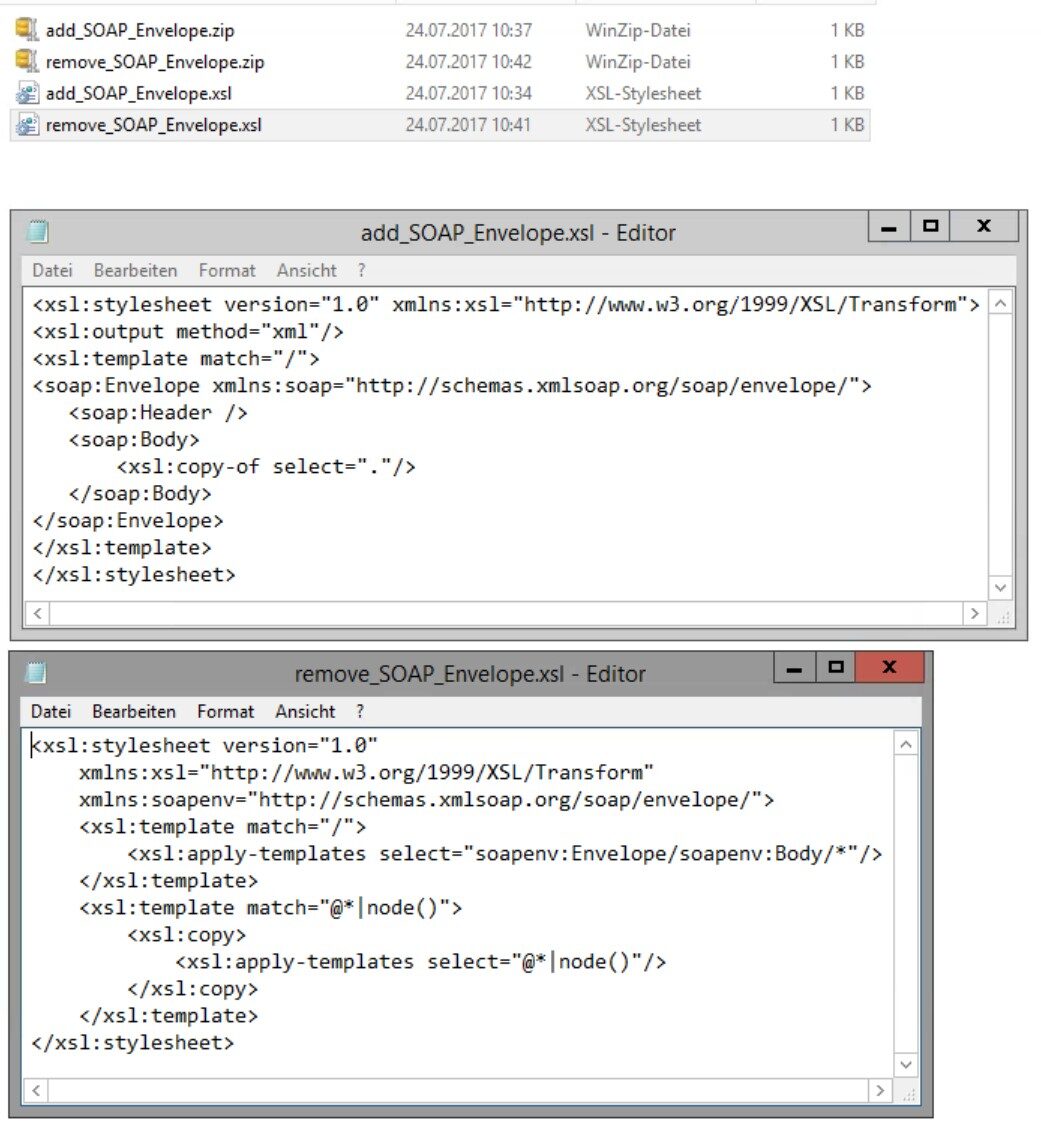
Create two new textfiles and name them add_soap_envelope.xsl and remove_soap_envelope.xsl
Insert the following xslt mapping code into the add_soap_envelope.xsl and save it:
Insert the following xslt mapping code into the remove_soap_envelope.xsl and save it:
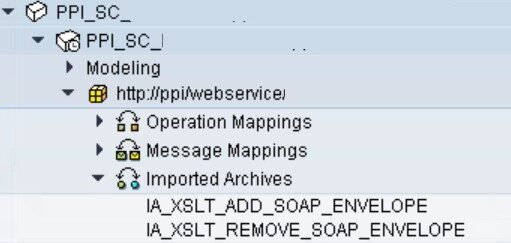
Put each file in a .ZIP container and import it as “Imported Archive” Object in your Enterprise Service Repository in a Software Component and namespace of your choice.
Adjusting the Operation Mapping
Due to the use of the HTTP adapter instead of the SOAP adapter we have to take care of the SOAP ENVELOPE manually in terms of adding and removing it.
In order to accomplish this both created XSLT mappings need to be placed within the relevant operation mapping.

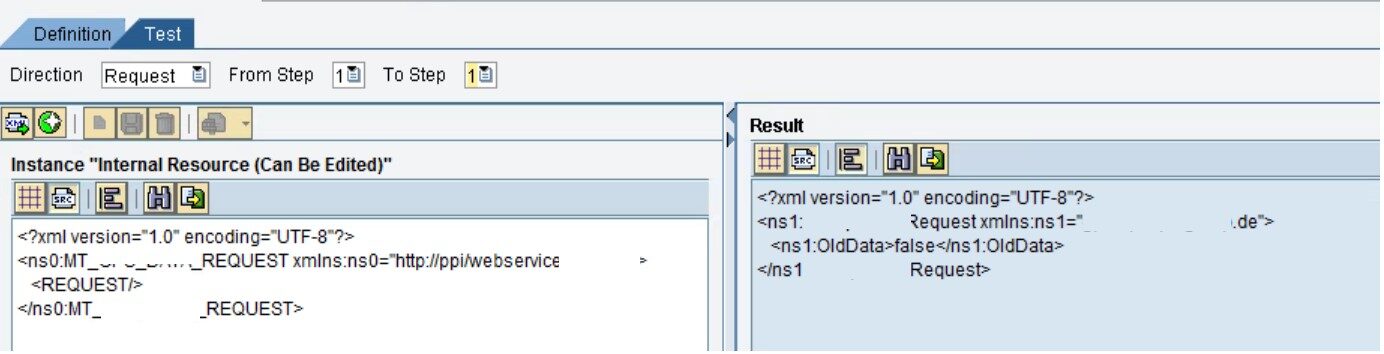
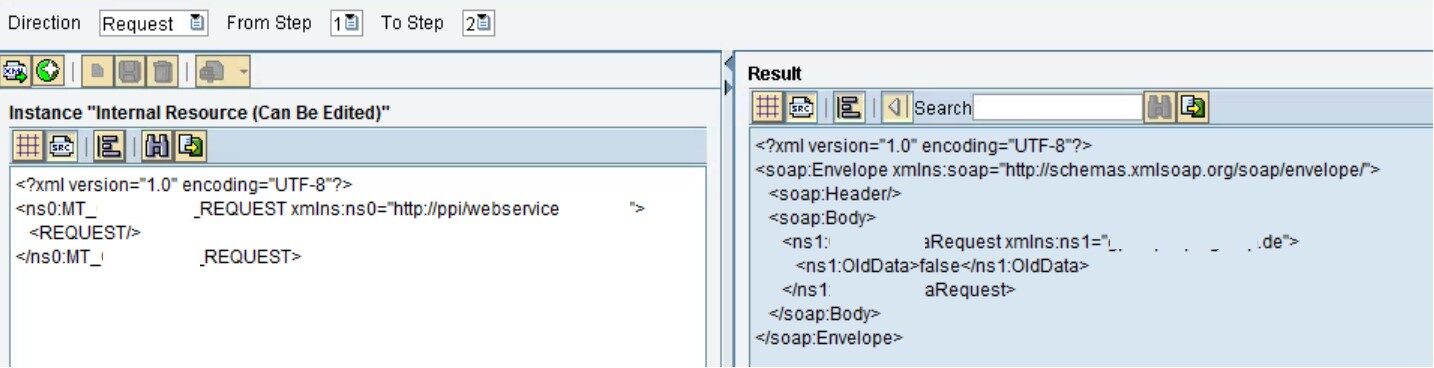
The request message will be mapped as usual with a message mapping from source to target structure. As a second mapping step, the XSL(T) mapping is added to add the SOAP envelope to the message.
For the response message this has to happen the other way around, first remove the soap envelope and second map the response message from source to target.

You can see this “add envelope”-logic if you select the “Test” button in the operation mapping and look at the mapping steps from step “1 to 1” and “1 to 2”:
(From Step 1 to 1)
(From Step 1 to 2)
Configure the HTTP Receiver Communication Channel
For the communication details we used a sm59 destination (customer request) but you can also use a “Addressing Type = URL Address”

This configuration enables you to add custom header attributes to a SOAP webservice scenario.
I hope there is at least one of you out there who finds this helpful.
Wish you the best guys!
Sources for the xslt-mapping and the hint with the http adapter:
https://archive.sap.com/discussions/thread/3891408
https://archive.sap.com/discussions/thread/3809757
New NetWeaver Information at SAP.com
Very Helpfull